Friday, December 30, 2011
Sock Knitting
I picked up this fun sock yarn on sale to try my hand at sock knitting. This pattern was easy and the foux cable adds interest. The pattern is for the Fall 2010 Knit Simple Magazine. My toes will be warm and colorful this winter!
Friday, December 23, 2011
Placemat Tote
You can make a tote bag in a jiffy using two placements. Placemats are finished front and back so most of the work is already done for you. I picked up these placemats already trimmed with lots of ribbon for just a few dollars. Look for deals on the clearance table, you only need two for this project. Begin with your two placemats placed face down, side by side, and pin a zipper face down between the two. Top stitch the zipper to the mats.
Use a wide zigzag stitch to secure the ends of the zipper and the mats. Be careful not to stitch into the zipper thereby breaking your needle! Trust me, I speak with experience.
Open the zipper to facilitate turning the bag. With right sides together sew around the remaining three sides of the bag using approximately 1/4 inch seam allowance.
Open seam at the bottom of the bag and match seam line of bottom with side as shown forming triangle. Stitch across the bottom of the triangle. This will form the base of the bag. Turn the bag to the right side.
Cut two pieces of matching grosgrain ribbon for handles approximately 20 inches long.
Attach the ribbon to the bag leaving a 3 to 4 inch tail. Tie a knot covering your stitching line.
 |
Enjoy! This is a great size for carrying a notebook, magazine, knitting project, quilt squares, etc.
Monday, December 19, 2011
Sweet Stack Towel
Friday, December 2, 2011
Lace Hand Towel
This towel and wash cloth set was a fun project for practicing lace knitting. I choose a lace pattern from my pattern stitch collection and added a seed stitch border. This would be a great project to practice a lace pattern for your next sweater project. I could really see the stitches (and the mistakes) by the time I finished this simple project. This small project would also be useful for practicing reading charts. Choose your lace pattern and multiply the stitch count by the number of repeats you will make then add 4 to 8 stitches for the border and each side. Cast on your stitches and start with a 4 to 8 row seed stitch border. Keeping 4 to 8 stitches in your seed stitch pattern at each side continue with the lace pattern until you reach your desired length. Finish the towel with your seed stitch border. This is an easy way to sharpen your lace making skills. This project was made with a cotton and bamboo blend yarn that is very soft with great drape. I had enough yarn to make a matching wash cloth.
Saturday, November 26, 2011
Gift Giving
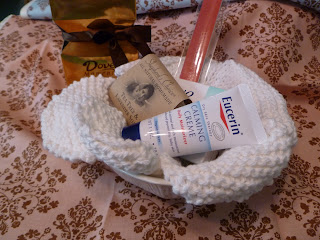
The Reverse Bloom Knitted Washcloth published in Weekend Knitting by Melanie Falick
is quick knitting but looks so special. I used a worsted weight cotton to knit this simple gift.
Thursday, November 17, 2011
Baby Crib Sheet
I decided to try my hand at making a flannel crib sheet for my daughters’ new baby to go with the new crib. I used the tutorial from http://www.makebabystuff.com/ with a few modifications. It is a 70 inch piece of 45” flannel with a 9” square cut out of each corner. The corner are stitched together to form the fitted sheet. I used my serger to finish around the edges to save myself the work of hemming; the edge will be under the mattress so no one will ever know.
The elastic is applied to each corner. I used a 12” piece at each corner rather than applying it to the entire length of the sheet. Pin the middle of the elastic to the corner seam and stretch it back each way as far as you can. Pin each end. Run a zigzag stitch through the elastic.
Be sure to use an elastic that will allow you to sew through it or all your work will be for not. Some elastic will lose its stretch if you zigzag through it but this elastic worked wonderfully.
Read the application instructions on the package to determine if it can be sewn through. If it says to insert it in a casing you will not have good results if you stitch through it. I used a zigzag stitch on my machine that makes three stitches up and back rather than a straight zigzag but that would work fine too.
Thursday, November 10, 2011
Tea Towel and Pot Holder
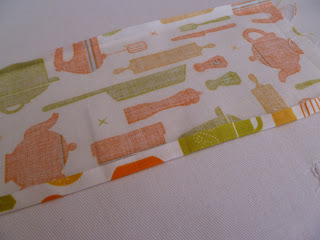
I found this cute kitchen print fat quarter at a great quilt shop Millie P’s, in Anoka, MN, that will be perfect for my daughter’s kitchen. The tea towel came from the same shop. I love one stop shopping! You may want to prewash both items to prevent uneven shrinkage. I began by cutting a 3 inch strip wider than the towel. Fold a hem on each side of the strip and press well.
Top stitch around the design. Hint. Sew the top and bottom in the same direction to keep fabric from twisting. After the top and bottom are attached sew each end.

The first pot holder was constructed from two 8 inch squares of the same fat quarter. The lining is batting with special thermal lining that works great for a light weight pot holder that will provide protection from hot kettle handles. You may want to add one layer of lightweight wool or cotton batting to make a thicker pad.

Pin well. Apply bias tape around the pot holder to finish the edges.
To finish the pot holder I put one round of quilting stitches approximately 1 inch from the edge. This simple project was low in cost, easy and quick to make, and a fun small gift for any hostess.

I made a second pot holder by trimming a 4 inch square with a bit of green quilting cotton that I had in my stash that matched quite well and stretched the kitchen fabric far enough to complete the set.
Pin the strip to the towel measuring from the bottom to ensure that the strip it even. Turn under the ends.
Top stitch around the design. Hint. Sew the top and bottom in the same direction to keep fabric from twisting. After the top and bottom are attached sew each end.

The first pot holder was constructed from two 8 inch squares of the same fat quarter. The lining is batting with special thermal lining that works great for a light weight pot holder that will provide protection from hot kettle handles. You may want to add one layer of lightweight wool or cotton batting to make a thicker pad.

Pin well. Apply bias tape around the pot holder to finish the edges.
To finish the pot holder I put one round of quilting stitches approximately 1 inch from the edge. This simple project was low in cost, easy and quick to make, and a fun small gift for any hostess.

I made a second pot holder by trimming a 4 inch square with a bit of green quilting cotton that I had in my stash that matched quite well and stretched the kitchen fabric far enough to complete the set.
Subscribe to:
Posts (Atom)


